Liquid Waste Removal Processes

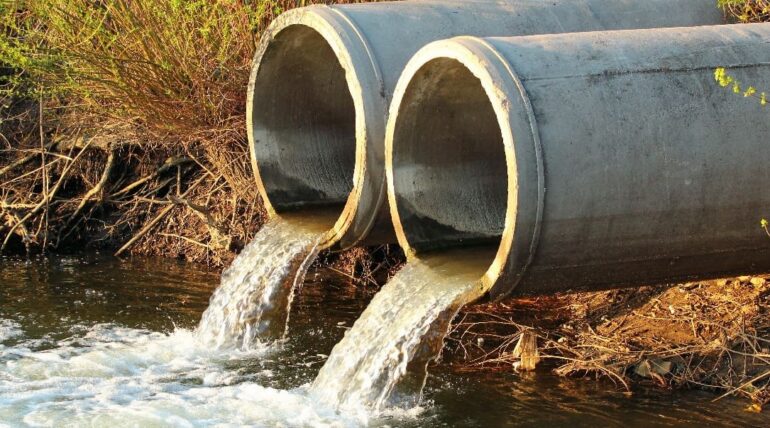
The manufacturing and production industries generate hazardous and non-hazardous liquid waste. If it isn’t disposed of properly, the ecosystem will suffer and businesses could face significant liabilities.

Inadequate disposal can also contaminate water sources that people use for drinking and cause various health risks. Liquid waste is typically stored in tanks, lagoons and ponds. Click the Liquid Waste Removal Perth to learn more.

The Definitive Guide to Liquid Waste Disposal | Shapiro

The dewatering process involves separating liquids from solids to reduce the volume of waste. This step is an essential part of managing liquid waste because it allows for smaller, more manageable volumes to be transported and treated. It also ensures that your company is following regulations regarding the handling of hazardous wastes and non-hazardous liquids.

The first step is to identify the type of liquid waste you’re dealing with. This will help you decide which treatment or disposal method to use. Wastewater is a common type of liquid waste that comes from households and businesses. It contains organic matter, chemicals, and pathogens, so it’s important to treat and dispose of it correctly. Chemical waste is another common type of liquid waste. This includes solvents, paints, pesticides, and other industrial chemicals. It’s important to handle this type of liquid waste with care as it can be toxic to humans and the environment.

Once you’ve identified the type of liquid waste you’re working with, it’s time to separate it into its different components. This helps minimize the risk of accidental spills and leaks. It also makes it easier to transport and dispose of the waste.

When it comes to transporting liquid waste, there are several options available. You can place the waste in disposal barrels or bins and take it to an approved dump area. This is one of the simplest methods of liquid waste removal, and it doesn’t require any additional technology or facilities. You can also use professional waste management services to transport the liquid waste for you.

There are a few ways to dispose of liquid waste, including land application, direct/indirect discharge, underground injection, and ocean dumping. Each option has its own benefits and risks. For example, direct/indirect discharge can cause environmental damage to sensitive ecosystems. Ocean dumping is a popular method for disposing of liquid waste, but it’s now regulated to avoid harming marine life.

Liquid waste is an inevitable byproduct of many business and household activities. When it’s not handled and disposed of properly, the consequences can be severe. However, implementing an efficient system for generating, treating, and transporting this waste can protect people and the environment.

Disposal

Disposal of liquid waste involves safe practices and procedures to protect human health, wildlife and infrastructure. Those who don’t follow proper disposal methods can face significant fines and legal action.

Whether at a home, office or manufacturing plant, the way businesses and households handle liquid waste can have a huge impact on the environment. Properly disposing of hazardous liquid waste is key to protecting the environment and ensuring public safety. This is why many facilities hire professional waste management companies to take care of the collection, transportation and disposal of liquid waste.

Before any liquid waste can be disposed of, it must undergo treatment and be treated to ensure that it isn’t dangerous for the environment or humans. Liquid waste treatment involves a variety of different techniques, including physical and chemical methods. Physical methods include sedimentation and filtration, while chemical treatments use chemicals to remove contaminants from liquid waste.

After the liquid waste is treated, it can be disposed of through sewer systems or in designated landfills. Sewage systems are commonly used in urban areas, while septic systems are popular in rural locations. Both systems require regular maintenance and inspections to prevent sewage system overflows, contamination and clogging.

Liquid waste can also be disposed of through incineration. This process involves combusting the waste at high temperatures, which helps to reduce its volume and destroy harmful pathogens. However, incineration releases toxic substances and greenhouse gases into the atmosphere, which can cause air pollution, exacerbate asthma and other respiratory conditions, and contribute to climate change.

Ideally, liquid waste should be recycled or reused wherever possible. This is a sustainable approach that reduces the demand for freshwater resources and can help to protect the environment. Liquid waste recycling and reuse can be achieved through several methods, such as membrane filtration, reverse osmosis and biological processes. These processes also have the potential to turn toxic waste into useful products, such as biogas and water.

Treatment

Liquid waste can be extremely dangerous, posing environmental, health, and economic threats if it is not handled properly. It can also be a source of contamination for watercourses and other natural resources. That’s why it is essential to follow strict disposal methods. Those that don’t take the time to dispose of liquid waste correctly risk fines and penalties.

Non-hazardous liquid waste can come from households, businesses, or industrial activities. It may be organic or inorganic, biodegradable, or chemically reactive and toxic. It can also be flammable, explosive, or corrosive. Examples include grit trap waste, grease trap waste, septic tank pumpings, chemical toilet waste, and municipal wastewater treatment plant sludge.

Hazardous liquid waste comes from manufacturing, oil and gas, mining, and other industrial sectors. It can contain a range of toxic chemicals, including heavy metals. It can be highly dangerous if it seeps into the groundwater or surface water sources, and contaminates them. This can disrupt ecosystems, kill marine life, and cause harm to human beings.

It is important to separate hazardous and non-hazardous liquid waste before it is disposed of. This can help to reduce the risk of cross-contamination and improve the efficiency of disposal measures. Then, the waste can be sent to authorised facilities that are equipped to handle the specific type of liquid waste.

Treatment processes are designed to convert liquid waste into harmless by-products or useful resources. They begin with screening and separation, which involves removing large particles from the liquid waste and separating out non-organic contaminants. This step is usually carried out using gravity-based separators or mechanical separators. It’s also possible to use a mixture of different methods to achieve the best results.

The next step in most cases is anaerobic digestion, which involves putting the waste into an oxygen-free tank where microorganisms digest it to produce methane and other gases that can be used for fuel. In other cases, a dewatering and thickening process is used to reduce the volume of the liquid waste, making it easier to transport and store. It can then be sent to recycling centers or turned into compost.

Recycling

The process of recycling liquid waste involves converting it into usable byproducts or resources. This type of treatment reduces the burden on natural resources and enables safe, responsible disposal. It also minimizes the impact of toxic contaminants on the environment, helping to reduce greenhouse gas emissions and prevent soil contamination. The processes involved in treating liquid waste typically include screening, separation, dewatering, oxidation, reduction and more.

There are four main types of liquid waste: household liquid waste, industrial waste, agricultural waste, and sewage. The former includes products like leftover paint, used motor oil, and cleaning solvents. These contain harmful chemicals that need to be disposed of properly. Industrial waste contains dangerous substances that are often the result of manufacturing or production processes. These require specific and strict treatment processes to ensure that they don’t pollute waterways or harm the ecosystem.

Agricultural liquid waste often includes organic matter such as animal blood and plant materials. This can be decomposed through anaerobic digestion to produce biogas and fertilizers. Sewage is the most common form of sewage, which includes human and animal excrement that is flushed into sewer systems. The resulting waste is often treated using biological methods to remove harmful pathogens and contaminants.

Other methods of treating and dumping liquid waste are incineration, deep well injection, and surface disposal. Incineration is an efficient way to reduce the volume of liquid waste and can help to eliminate odors and bacteria. However, it can create toxic air pollutants and greenhouse gases, so it is important to treat the resulting ash before reusing it. Deep-well injection is a more environmentally friendly method that uses an underground well to inject liquid waste into the ground. It is usually done in conjunction with other treatments to prevent contamination of the surrounding soil.

The best way to handle liquid waste is to recycle and reuse it whenever possible. This can be as simple as bringing your old tupperware and aluminum to centers where it is repurposed into new products. In many cases, it is also possible to recycle liquid waste through processes such as reverse osmosis and UV radiation, which can turn hazardous substances into useful byproducts that can be reused in agriculture and other applications.

Foundation Repair

What You Need to Know About Foundation Repair

Foundation Repair Greensboro NC fixes issues like cracks, leaking, and uneven floors. It also restores the original elevation of a building so that everything works as it should.Foundation Repair

Hairline cracks are a common sign of foundation problems. However, if they grow wider or longer, it’s time to call for help.

Professionals have specialized tools and training, so they can quickly identify the problem and make lasting repairs. They also work efficiently, saving you time and money.

Foundation repair is an important investment, and homeowners need to understand the factors that influence the cost. The extent of damage is the most significant factor, with minor repairs being less expensive than major ones. It’s also possible that the repair process will reveal other issues, such as plumbing leaks or electrical problems, which can add to the overall cost. Choosing a qualified contractor and requesting detailed quotes is essential to ensuring that the project is done right.

The type of foundation and home size are other factors in the overall cost. For example, a poured concrete foundation is more costly to repair than a wood-frame home. Similarly, larger homes are more expensive to repair because they require more materials and equipment.

A structural engineer consultation is often necessary to determine the severity of the problem and recommend the best repair method. This can add between $300 and $1500 to the total cost of the project. Local regulations may require permits and inspections, which can also add to the cost.

If left untreated, a foundation problem can cause serious damage to the structure of your home. It can lead to cracks in walls and floors, sticking doors and windows, and even collapsed ceilings and burst pipes. This can negatively impact your home’s resale value and make it unsafe to live in.

There are several things you can do to help keep foundation repair costs down, including repairing minor cracks promptly and scheduling the work during off-peak times. You can also reduce costs by implementing a proactive approach to foundation maintenance and taking steps to mitigate soil movement. This includes choosing appropriate landscaping, directing water away from the home, and addressing drainage problems.

Some financing options are available for foundation repairs, including home equity loans. However, it’s important to weigh the pros and cons of these loans before deciding to use them for this purpose. It’s also important to find a contractor that offers flexible payment terms and competitive rates. This can help you manage your budget and avoid paying for interest on money that you don’t need.

Repair Methods

Several different methods are used for repairing foundation issues, each with its own advantages and considerations. The extent of the damage, soil conditions, and wall configurations will determine which method is best for your home. Repair methods can range from minor crack sealing to a complete rebuild of the foundation. A qualified inspector can help you choose the right repair method for your needs.

Cracks in the foundation walls can be patched with hydraulic cement, vinyl concrete, epoxies, or silicone or polyurethane sealers to stop water seepage and further damage. This is a relatively inexpensive option and usually doesn’t require major excavation or landscaping disturbances.

If your foundation is sinking, a foundation repair contractor can install steel piers underneath your house to support it. These piers are long, steel rods that are driven into the ground until they reach stable soil or bedrock. They can be driven into the soil without disturbing existing structures, are able to bear significant loads, and are suitable for most upper-soil conditions.

Other repair methods include underpinning, which involves excavating and strengthening the existing foundation by transferring its load to deeper soil or bedrock. This method is typically used in situations where the original foundation has failed due to shifting or movement of the surrounding soil.

Another option is to replace the existing foundation with a new concrete foundation, which is often more expensive than other repair methods. However, this method is highly effective and can provide lasting stability.

Sagging girder beams can be shimmed or replaced to increase their strength and restore the structural integrity of your home. Repairing or replacing these beams will also help prevent further deterioration and improve the appearance of your home’s exterior.

Pay attention to sloping floors, which are a common sign of foundation problems. Your floors should be level and even, so any noticeable sloping could indicate that your foundation has shifted unevenly. You can check the slope of your floors by rolling a ball across them or using a level. Sagging doors and windows are also a red flag, as they may not close or open properly. If you notice any of these issues, it is important to get a professional inspection as soon as possible.

Contractors

Foundation repair is a necessary step to maintaining the structural integrity and overall stability of a building. Various factors like soil movement, water damage, and poor construction can cause foundation issues that need to be addressed right away. Taking the time to identify and address these problems can prevent them from becoming bigger, more costly issues down the road. It also helps preserve or even boosts property value.

Whether your home has a concrete slab or a pier and beam foundation, you should always be vigilant about signs of foundation problems. These can include cracks in walls and floors, leaning chimneys, or sloping or uneven floors. Identifying these signs early on can help you avoid more expensive structural problems down the road.

It’s important to work with a professional foundation repair contractor who can provide a comprehensive solution that addresses your specific needs. In addition to addressing the structural integrity of your home, they can advise you on other preventative measures that can save you money and protect your investment.

The type of foundation and extent of the damage will influence the cost of the repair. For example, minor cracks in the foundation typically require less material and labor than major structural issues. In addition, the size of your home will affect the price as larger homes require more materials and labor to repair.

A good foundation repair contractor will carefully evaluate your home to determine the cause of the problem and recommend the best solution. Typical repair methods include epoxy injection, piering, and underpinning. Piering involves installing steel or concrete pilings beneath the foundation to transfer the weight of your house to a more stable soil layer. Underpinning is similar to piering but uses concrete blocks instead of steel piers.

Proper drainage is essential to a healthy foundation. A poorly functioning gutter system can lead to water pooling near the foundation, causing it to expand and weaken the structure. Regularly cleaning your gutters and ensuring that the ground slopes away from your foundation can help prevent water infiltration. Additionally, keeping trees and large shrubs trimmed can prevent them from growing into your foundation or disrupting the soil around it.

Warranty

Investing in foundation repair is an important step to protect your home’s structural integrity and increase its value. While the upfront cost can be significant, addressing foundation issues early on prevents further damage and saves money in the long run.

Signs that you may have foundation problems include cracks in walls or floors, doors and windows that don’t close properly, and uneven or sagging floors. The longer you wait to address these problems, the more severe and costly the repairs will become. A professional will be able to identify and diagnose the issue, recommend the best solution, and perform the necessary work to correct it.

When choosing a foundation repair contractor, you should choose one with extensive experience and knowledge of the various methods of repair. Ensure that they’re licensed and insured, and ask for references from previous customers to assess the quality of their work. You should also consider whether the company offers financing options to ease the financial burden and make the project more manageable.

A warranty is an indication that the foundation repair contractor stands behind the quality of their work and materials. The length of a warranty can vary depending on the method used and the underlying issue addressed. For example, steel piles typically have a lifetime warranty but concrete and helical tiebacks have a limited lifetime warranty.

However, it’s important to note that no foundation repair is permanent. Even with the best work, there’s always a possibility that other parts of your home will settle in the future. This is because the soil underneath your house is constantly changing. However, addressing any water or drainage issues can reduce the risk of further settlement by lowering the area around your foundation to less reactive soils.

If you decide to sell your home in the future, a transferable warranty will be attractive to prospective buyers. It will give them peace of mind that any future foundation issues will be covered, which can help mitigate potential concerns and increase the value of your home.

How AC Repair Can Save You Money

Air conditioning systems rely on regular maintenance to work efficiently and effectively. A professional can catch and fix small issues before they become bigger problems.

Air conditioning maintenance involves inspecting the system to identify signs of wear and tear, servicing what needs service, and repairing any components. This helps restore the AC to full functionality. Click the AC Repair Orlando to learn more.

AC Repairs: Why You Should Leave These 3 Jobs to Professionals | Blog

Refrigerants are a must-have for cooling your home, but they’re not indestructible. Like any machine, they can experience a certain amount of wear and tear over time, resulting in cracks and leaks. A few key signs of refrigerant leaks include puddles on the ground, hissing sounds from inside your home, and low airflow.

There are several common causes of refrigerant leaks, including vibration, corrosion, and weakened rubber seals around valves. Even the most thorough AC maintenance can’t prevent these issues entirely, but it does help.

The evaporator coils in an AC unit are notorious for leaking, especially at the “U” bends and welded joints. These areas are susceptible to mechanical vibrations, which can cause the copper pipes to rub against each other. This creates formic acid, which eats away at the pipe over time, eventually creating a leak.

Leaks can also occur from straight-up physical damage. If you’ve recently had any major construction work done on your home, the copper lines for your AC could have been accidentally ripped or cut during the renovation. The vibrations from these activities can stress welds and joints, causing them to crack or break.

Another common issue is poor installation, which can result in a lack of proper insulation for the pipes. This leads to hot spots, which aren’t conducive to the proper functioning of an air conditioner. These problems are easy to spot, but the right HVAC technician can fix them easily and affordably.

One final reason to watch out for leaking refrigerant is that the R-22 coolant used by older model air conditioning systems has been discontinued. As a result, the supply is dwindling and prices are increasing. This means it may be time to upgrade your air conditioner.

If you think you have a refrigerant leak, you should call an HVAC professional as soon as possible. They’ll find and repair the leak, then restore the correct level of refrigerant to your system. This is far safer and more effective than simply adding refrigerant, which can make the problem worse. Plus, recharging your AC with the incorrect refrigerant can damage it or make it unresponsive.

Faulty Components

When the temperature is high, it’s essential that your air conditioner is working properly. This is why professional maintenance and annual inspections are so important. Whether you have a standard or ductless system, the highly skilled technicians at King know how to spot potential issues before they become serious problems.

A common AC repair issue involves the fan or condenser unit. If you notice that there are strange noises or smells coming from these components, it’s time to call in a technician. It may be a sign that they are damaged or that there’s an electrical problem.

One of the most common problems that require immediate AC repairs is a tripped circuit breaker or blower belt. It’s a simple fix, but it’s important to turn off your AC and call a professional if this occurs. This prevents any further damage to the system and helps reduce the chance of further breakdowns in the future.

Another common AC repair problem is low refrigerant. This is often caused by a faulty sensor that causes the compressor to believe that it is not receiving enough cooling power. This can be corrected with a reprogramming of the thermostat, but it’s best to have this repaired by a professional.

It’s also possible that your air conditioning unit has a loose or dirty coil. Dirty coils can cause the compressor to overheat and fail, resulting in reduced cooling capacity and higher energy bills. In order to avoid this, make sure to regularly clean your air conditioner’s outdoor unit and keep surrounding vegetation trimmed back.

The evaporator coil in your air conditioner works similarly to a sponge in that it absorbs heat from the home’s air and then releases it outdoors. If this coil is covered in dust or other debris, it can block the flow of refrigerant and reduce the cooling capabilities of your air conditioner. While you can remove some of this debris yourself by hosing down your unit and brushing the outside of it, this is often a job best left to a professional AC repair technician.

Worn Bearings

Bearings wear out for a variety of reasons. Insufficient lubrication is one common cause. This causes the bearings to work harder to overcome friction, which shortens their lifespan. A lack of lubrication can also increase the temperature of a bearing, which can damage it further. Slight shaft misalignment can also force bearings to deal with loads that they weren’t designed for, reducing their lifespan.

Unusual squeaking noises are another sign of worn bearings. This is most often seen in motor bearings, and it occurs when the bearings are working too hard to compensate for an imbalance in load zones. The resulting friction causes a squeak that is heard during cooling cycles.

Other signs of worn wheel bearings include uneven tread wear and an increase in steering wheel or vehicle vibration at higher speeds. Excessive vibration may become more noticeable during cornering and braking, which can impact handling and safety. Worn wheel bearings can also cause premature wear on other components like struts and rotors.

Improper storage or handling is another leading cause of bearing failure. For instance, leaving a box of bearings open can expose them to dirt and other contaminants. This contaminates the bearing, which increases friction and heat. It can also reduce the load zone size, which leads to overloading and fatigue.

Poor storage can also lead to improper lubrication, which reduces bearing lifespan. Using the wrong type of lubricant can cause premature wear or corrosion, which damages the bearings. In addition, improper handling can expose bearings to dampness and varying temperatures. Lastly, bearings stored outdoors can be exposed to UV radiation, which can damage the surface of the bearing.

Keeping track of bearing wear is essential to extending the life of this vital component. Regular vibration monitoring can help detect issues before they lead to catastrophic bearing failure. In addition, a documented lubrication schedule can ensure that the right amount of lubricant is used and applied properly. Using high-quality seals and following manufacturer specifications is also crucial to protecting bearings from damage. By catching these problems early, you can keep your AC system running smoothly.

Unpleasant Smells

While cranking up the AC in your home offers a welcome summer oasis, unpleasant smells circulating through the vents signal that something is amiss. From musty mold growth to burning plastic and electrical system issues, funky odors are the first warning signs that your AC may need repair or replacement. Professional air conditioning maintenance addresses odor-producing problems before they escalate into systematic breakdowns.

Musty odors often indicate the presence of mold on the evaporator coil or in ductwork, which needs cleaning or replacement. In more severe cases, the odors could be caused by an overheated compressor or an electrical short in the blower motor. Both of these problems could pose serious safety hazards if you continue to run your system until an AC technician can visit.

If you detect an odor that smells like burning rubber or burnt plastic, it means that one or more components in your unit are on fire. It’s important to turn off your air conditioner immediately and seek emergency services. The smell may also be the result of a pest infestation that requires professional extermination.

A chemical or fishy odor can also mean that the refrigerant is leaking into the unit’s motor or another warm component. This is a major problem that should not be ignored, as some forms of refrigerant are toxic and can harm your family’s health.

An odor that smells of sewer or rotting meat usually means that the condensate drain pan and connected PVC lines are clogged with sewage and debris. This is a serious plumbing problem that requires professional intervention before it becomes a much more serious health hazard.

The stench of rancid eggs may indicate that the air filter is dirty or has not been replaced in a while. A clogged air filter allows the buildup of lint and dirt to reach the inside of the unit, where it can become moist and encourage the growth of unhealthy bacteria and certain types of molds.

It’s crucial to regularly clean or replace your air filter and conduct regular HVAC maintenance in the fall for the heater and spring for the AC to prevent these issues. Additionally, homeowners can prevent odors from developing by keeping the area surrounding their air conditioning units free of trash buildups, sewage leaks, pet waste, rodent nests and other sources that may infiltrate their ductwork.

Faucet Repair

How to Do Your Own Faucet Repair

Before attempting faucet repair, turn off the water supply to the fixture. You may lose small parts or cause a leak if the water is still running.Faucet Repair

Start by removing the aerator (if there is one). Then, remove the handle(s) and decorative part of the escutcheon. Next, unscrew the disk cylinder mounting screws. For professional help, contact Plumbing Express, Inc. now.

Many homeowners are able to fix leaky faucets themselves with only basic tools. It’s important to learn about the different types of faucets (ball, cartridge, and ceramic disk) as each type may have its own unique set of problems. In addition, it’s important to understand what causes a leaky faucet so that you can troubleshoot the problem and identify the appropriate solution.

For example, a leaking faucet with a ball or cartridge head can usually be fixed by tightening the adjusting ring or packing nut, which holds the valve seat or stem in place. In some cases, this can be as simple as a few turns with a wrench, but it’s also possible that the nut needs to be removed completely and replaced.

Another common cause of a leaking faucet is worn out or damaged O-rings. These rubber seals are located under the spout and create a water-tight seal, but over time they can become worn out or cracked, which allows water to seep through. You can usually find replacement O-rings at a hardware store or plumbing supply specialist, but make sure the new O-ring is an exact fit for your faucet. Also, it’s a good idea to coat the new O-ring with plumber’s grease before installing it.

If you have a leaky faucet with a ceramic disc, the most likely culprit is worn out neoprene seals that are located in the base of the ceramic-disk cylinder. To replace these seals, you’ll need to remove the handle, unscrew the escutcheon cap, and loosen the disk cylinder mounting screw with a blunt screwdriver. Then, you can remove the cylinder and sand the bottom of the ceramic disk with emery cloth to restore its smoothness and remove any dirt that has collected inside the cylinder openings.

Once the cylinder is removed, you can install the new seals and reassemble the faucet. When reassembling, be careful not to overtighten screws or nuts as this could damage or bend delicate parts of the assembly. Finally, turn on the water to test your work and make any necessary adjustments. If you’re still experiencing a leaky faucet after following these instructions, it may be time to call a plumber in San Diego.

Repairing a Faucet with a Cartridge

Cartridge-style faucets often have mineral deposits that clog the valve seat. When this happens, water no longer passes through the cartridge, and the faucet begins to leak. You can usually fix this by replacing the cartridge. The best way to do this is to take the old cartridge with you when buying a replacement, so that you can make sure it’s an exact match. It’s also a good idea to pick up some plumber’s grease for the new O-rings, as well as the brass screw on the top of the cartridge shaft if it has one (some don’t).

Before you begin, shut off the water supply. Then, remove the handle by unscrewing the screw on the back side of the handle. If there’s a bonnet nut holding the cartridge in place, remove it with a crescent wrench. Some cartridges have two tabs that fit into notches on the faucet body to hold them in place; if yours is one of these, use pliers to pull it straight up. You may need to twist the cartridge a bit as you do this to get it fully seated.

Once the cartridge is out, clean off any mineral deposits with distilled white vinegar and a scouring pad. Use a utility knife to cut off any old O-rings and coat the new ones with nontoxic, heat-proof plumber’s grease. You’ll likely have to replace the rubber washer that sits at the bottom of the cartridge, too.

You’ll also need to replace the cam washer and the retaining clip, which is sometimes made of stainless steel and has a keyway on its cap. If your faucet has double handles, check to see which one is leaking. If both are, it’s important to reinstall the cartridge in the same direction, so that the tabs on the cartridge line up with the corresponding notches on the faucet body.

To do this, use a screwdriver to remove the decorative caps on the handle, which will expose the screw that holds the handle in place. Then, loosen the screw with a screwdriver and tilt the handle back to remove it. You’ll need to replace the decorative cap once you’re finished with your repairs.

Repairing a Faucet with a Ball

You’ll be able to find parts for cartridge-type faucets at most hardware and home centers, but the parts you’ll need to repair a ball or ceramic-disk faucet will be more difficult to find. You may have to order them, or you can try to make your own parts from washers and O-rings purchased separately. Before you begin working, shut off the water supply to the faucet. Then, loosen the set screw on each handle with a wrench or screwdriver and remove the handle. This will expose the screw that holds the valve seat in place. If the screw is tight, use pliers to loosen it. You’ll also want to remove the decorative cap at the top of the handle, which should have an “H” for hot and a “C” for cold. This will reveal a screwhead underneath, which you can remove with a screwdriver.

Once the screw is removed, you can lift out the valve seat and replace it if necessary. The rubber seats and springs are usually easy to remove from the valve seat as well. If you can’t get them out, you can cut them free with a knife and then reassemble the faucet by inserting the new seats and springs. It is important to install the new spring with the narrow end down. Otherwise, it will push the seal out of place.

Lastly, you’ll need to replace the cam and packing to restore water flow to your faucet. You can do this by first loosening the cam nut, which is a cone-shaped piece below the handle. This can be done with a wrench or pliers, but you’ll need to remember the orientation of the nut and packing when reassembly occurs.

You can now replace the plastic cam, which should come with a new packing and a new gasket. Once you do this, you can replace the nut and cam washer with a wrench or pliers. You’ll need to remember the orientation of the washer and cam, as you will be reassembling them in reverse. Now, you can reinstall the handle and turn on the water to test for leaks.

Repairing a Faucet with a Ceramic Disc

Ceramic disc faucets have a very sleek and luxurious look that is very popular. However, like all faucets they do need maintenance and repair. The main problem with these type of faucets is mineral build up that causes them to leak or not work properly. This is usually a problem in areas that have hard water. The good news is that it is very easy to fix. Generally you can just remove the cartridge and give it a good rinse. In some cases, especially if there is a lot of sediment, you can soak the cartridge in a mixture of 50% water and vinegar for 30 minutes and then rinse it again. Once it is cleaned it will usually be fixed and you can just put the cartridge back in and turn on your water again.

First, you need to shut off the water supply to the faucet. You will need to locate the hot and cold shutoff valves that are connected to your water pipes under your sink and turn them off. The valves will often have knurled knobs that you can rotate clockwise to shut them off. Once the water is off you can start working on your faucet.

Next, you need to remove the handle from the faucet. There is a screw that holds the lever to the lever post and you will need to remove this screw with a screwdriver. Once you have removed the handle, pry off the decorative cap that covers the cartridge and loosen the set screw that holds it in place. Once the set screw is removed you can pull the cartridge out and inspect it for damage. The rubber seals in the cylinder might need to be replaced. If they are worn or damaged, you can use a nonmetallic scrubber to clean the cylinder openings and then replace the seals.

Once the seals are replaced, you can put the cartridge back in and turn on your faucet again. If you have a single-handle faucet, you can now install the new cam washer and replace the decorative cap. Make sure that you align the keyway on the cam cap with the tab on the faucet body so that the cartridge will stay in place.

Kitchen Remodeling

Kitchen Remodeling Cabinets and Countertops

The kitchen remodel goals you define for your project will influence many decisions, including the choice of cabinets and countertops. There are many options for both, from natural stone to manufactured products.Kitchen Remodeling

Be sure to factor in plenty of storage space, especially in lower cabinetry. Also, consider unique design elements like a knife drawer.

Cabinets are one of the largest components in a kitchen and typically account for up to 40% of your remodel costs. If you’re happy with the layout of your cabinets but would like to freshen up their appearance, consider repainting. This can be a fairly labor-intensive DIY project but will cost a fraction of replacing them. A local kitchen design professional can help you select a paint color that will coordinate with your existing colors and blend well with adjacent cabinetry.

If you’re adding new cabinets, or have space to add a few uppers, consider upgrading the back panels. Most cabinet manufacturers offer a selection of different options, including plywood that matches the existing cabinets for a seamless look and stronger construction that’s less likely to sag over time.

Other less-expensive options use thin panels, metal hanger rails and brackets, or picture-frame construction. Choose the plywood option to add durability and ensure that your cabinets are properly supported, as these less-expensive methods can lead to falling cabinetry.

For a more modern look, choose open shelving as an alternative to traditional cabinets. This is a great way to show off favorite dinnerware, glassware, or decorative teapots. It’s also a good place to stash cookbooks and other reading materials in easy reach.

Under-cabinet lighting is another easy upgrade that will make it easier to see and reach items in upper cabinets. It can also create a sultry, contemporary feel or a cozy distant effect depending on the warmth of the light and the color used. Consider adding power strips and USB plugs for convenience.

Countertops

Countertops have a big impact on the overall look of your kitchen. They need to match your cabinets for a cohesive design, but they also offer a great opportunity to make a statement and showcase your personal style. Whether you go for the natural look of stone or a modern quartz slab, there’s a countertop to fit every style.

The most popular choice is granite, which is heat- and scratch-resistant and can stand up to heavy use for years to come. Another option is marble, which offers a classic beauty with a timeless look. If you prefer something less permanent, laminate countertops are a budget-friendly choice that comes in many colors and styles. But they’re not as durable as other materials and won’t add resale value to your home.

If you’re looking for a more unique countertop, consider concrete. It’s a strong, customizable material that can be stained in any color or given a textured finish. It’s an eco-friendly alternative to traditional stone, and it’s easy to install DIY. Another option is wood, which works well with rustic or farmhouse-style designs.

Backsplashes also make a big difference in your kitchen. They’re a functional element that helps prevent spills and grease from damaging the wall behind your countertop. These fixtures can be as simple or as complex as you want, but they can offer an excellent opportunity to bring a creative touch to your kitchen remodeling project.

For a more long-term update, you can paint your counters or refresh them with contact paper. Both of these options are inexpensive and provide a quick way to change the look of your kitchen. They’re also ideal for rental properties or if you need to remodel on a tight budget.

Appliances

Whether you’re upgrading to new appliances to improve function or add style, the types and brands you choose are key to your kitchen remodel. Choose major appliances that match both your cooking needs and the look you’re after – a wide range of sizes and designs are available to suit any space.

A well-thought out appliance plan is crucial to your kitchen’s design and flow, as they are typically one of the biggest line items in any renovation budget. For this reason, many homeowners take the time to consider and test drive multiple options before making a purchase. Some of the most popular choices include a gas, electric or induction cooktop, an oven that features both conventional and convection heat settings, and a refrigerator with smart capabilities like food preservation options.

Cabinet doors are another element that sets the tone for your entire space, with a variety of styles to choose from and a wide array of color options, hinge styles and knobs/drawer pulls. Aside from their aesthetic appeal, other factors to keep in mind when selecting cabinets include storage space, durability and a door finish that complements your other fixtures and finishes.

Before committing to a cabinet purchase, always make sure the brand you’re considering offers quality warranties and parts for repairs, particularly on the most expensive items (like your fridge or stove). This will ensure that your investment is protected for years to come and gives peace of mind that should something unexpected happen, it will be covered. It’s also a good idea to talk with a local repair man before making any purchases to see what kind of support they can offer.

Flooring

Kitchen floors are one of the most important elements in a kitchen. They must withstand heavy foot traffic, spills and drops, and they must be durable enough to resist moisture damage.

There are many options for the kitchen floor, including laminate, vinyl and linoleum. They are usually the most budget-friendly flooring materials. Wood is a popular choice for the kitchen, but it must be treated to withstand the heat and humidity of this room. Engineered hardwood is a popular option for the kitchen because it has a real wood veneer backed by plywood, making it more resistant to moisture than solid wood. It can also be installed more quickly because it doesn’t need to be nailed down like traditional wood flooring.

Stained concrete is another durable kitchen flooring material. It can be stained to look like stone or wood, and it is available in a variety of colors and textures. However, it can be slippery when wet, so mats should be placed in areas where excessive moisture is likely to occur.

If your kitchen is part of an open-concept living space, or if you’re remodeling to sell, consider continuing the same flooring into the adjacent rooms. This will increase the sense of flow in your home and help the rooms to feel connected and cohesive.

Full-scale kitchen remodels may require tearing out the existing floors to start fresh. This work typically takes a few weeks, and you’ll be living with strangers in your house for a while. For a complete renovation, you’ll need to hire a general contractor (GC), who will coordinate the subcontractors for the project and manage the schedule. However, if you’re comfortable with the basics of construction and have some DIY skills, you can save some money by hiring the subcontractors yourself.

Lighting

Whether you’re changing the layout or simply updating fixtures, lighting is one of the most important aspects of your kitchen remodel. It is essential for illuminating your work space and making it feel inviting.

If you’re planning a complete kitchen renovation, the first step is to tear out the old materials. This can be a noisy and messy process, especially if it involves removing load-bearing walls. If you plan to do this yourself, make sure you have a firm understanding of plumbing and electrical wiring before beginning. Even experienced DIYers should leave major plumbing and electrical work to professionals. Kitchen remodeling often requires many new circuits, and new wiring must be brought up to current code standards. This is complicated and time-consuming work, and it can create serious safety hazards if it’s done incorrectly.

You can find a wide variety of light fixtures, from flush to pendants, to light your new kitchen. The number and type you choose depends on the size and layout of your room, as well as your desired functionality. For example, recessed lights can be a great way to illuminate countertops and eliminate shadows. They are also a popular choice for kitchen island lighting, although it’s important to consider the height of your ceiling to avoid potential clearance issues.

You can also use under cabinet and track lighting to illuminate cabinets or highlight specific areas of your kitchen. This is a good option for kitchens with multiple levels, and can be especially helpful in areas where storage is located underneath counters. You can also use dimmers and other controls to adjust the brightness of your kitchen. The color temperature of your light bulbs will also have a big impact on the overall color of your kitchen. Warmer bulbs give your space a cozy, golden feel while cool white bulbs can create a more energizing atmosphere.

What Does a Plumber Do?

Plumbers Bossier City install and repair the pipes that carry water, waste, and gases throughout homes and businesses. These technicians must have strong mechanical skills and be comfortable working in tight spaces.

They also must be able to read and understand blueprints to install plumbing systems properly. In addition, they must be familiar with local building codes and regulations.

Plumber

Plumbers install piping and plumbing fixtures such as sinks, toilets, showers, and water heaters. They may work on residential, commercial, or industrial sites. Residential plumbers typically focus on installing and repairing plumbing systems in homes and apartments. This can include examining pipes, assessing damage, and recommending plumbing solutions. They also work with customers to ensure their satisfaction with the work and its related costs. Plumbers often work in confined spaces and may need protective gear to prevent injury.

Plumbers also work with other professionals, such as engineers and construction teams, to seamlessly integrate plumbing systems into building projects. This can involve interpreting blueprints and plans, ensuring compliance with local and state regulations, and obtaining necessary permits. Plumbers may also be responsible for testing and certifying plumbing systems. They use various tools and materials to perform installation tasks, including copper, PVC, and PEX pipes.

Plumbing systems are essential for water distribution and waste management in buildings. They provide clean drinking water, regulate indoor climate, and ensure the safety of occupants by removing and disposing of waste. Plumbers are responsible for maintaining and repairing these important systems, ensuring they are efficient and functional.

Many different plumbing systems exist, each designed to meet the specific needs of a particular building or set of conditions. For example, a high-rise apartment building will likely require a more complex plumbing system than a single-family home. Some systems are also designed to be more energy efficient than others. For instance, a low-flow toilet can significantly reduce the water used in a bathroom.

Plumbers must have excellent critical thinking and problem-solving skills to assess and repair plumbing problems. They must be able to weigh options and make decisions that balance cost, time, and efficiency. They must also have strong written and verbal communication to relay plumbing issues and recommend solutions to customers. They often need to describe the nature of the problem, explain why it is occurring, and outline potential solutions. This is especially important when working on large, complicated systems, such as those in hospitals and industrial settings.

A plumbing system is essential for providing clean and safe water in residential, commercial, and industrial environments. Plumbers maintain these systems by installing, repairing, and maintaining pipes and fixtures. They also ensure that unblocking drains and sewer lines safely dispose of sewage. In addition, they are often called on to troubleshoot issues with water heaters, dishwashers, and washing machines.

Plumbers must have excellent analytical and problem-solving skills to diagnose and repair issues quickly. They must also be comfortable working in tight spaces and with various tools and materials. Sometimes, they may be required to work on-call and respond to emergencies outside normal business hours.

Some common plumbing problems include leaking showers, clogged toilets, and running drains. Whether these issues are minor or major, plumbers must be able to resolve them quickly and effectively. This requires them to have strong communication skills and be able to listen to customers’ concerns. It is also important for them to know how to use advanced tools and equipment like plumbing software, which can help them improve service delivery and track progress.

While most of us think of residential plumbing services, these professionals are also responsible for maintaining the plumbing systems in office buildings, schools, hospitals, and other large public or private facilities. These systems have larger water supply lines and more complex plumbing fixtures and appliances than residential ones. In addition, they must be able to meet stricter building regulations.

In this setting, plumbers often collaborate with other professionals, such as construction teams and architects, to ensure the plumbing is seamlessly integrated into the building’s infrastructure. They also must be able to work with a wide range of materials, from metals like copper and steel to plastics and vinyl. In some cases, they may even be responsible for installing fire sprinklers. Due to the complexity of these systems, they require a greater level of skill and expertise than residential plumbing.

Plumbing systems remove waste, provide hot and cold water, and regulate indoor climate. They are vital to our everyday lives and the smooth functioning of residential, commercial, and industrial spaces. Plumbers are skilled tradespeople who install, repair, and maintain these systems. Plumbers usually work as employees of plumbing companies, but some are self-employed contractors. Their job duties include installing and repairing garbage disposals, toilets, showers, and faucets and resolving plumbing issues in homes and businesses.

Some common plumbing problems that require repair are clogged drains, leaking pipes, and broken water heaters. Plumbers can promptly fix these problems for homeowners and business owners to minimize damage and prevent further inconveniences. They also inspect plumbing systems to identify and diagnose potential issues.

In addition to repairing pipes, plumbing fixtures, and appliances, plumbers can install new ones. They use tools to run diagnostic tests on pipes, assess the condition of fixtures and appliances, and determine if any parts need to be replaced. They also ensure that plumbing systems meet local and state codes before installation.

Most plumbing issues are not easy to solve for a homeowner, especially if they need to be addressed immediately. These problems can lead to serious consequences for the health and safety of a family or business. That’s why it is important to have a reliable plumber nearby in case of any emergency.

A good plumber can save a homeowner or business owner a lot of money and headaches in the long run. They can help them avoid costly repairs and improve the efficiency of their plumbing system. Sometimes, it is cheaper for them to hire a plumber than to buy and install new equipment.

Plumbers are skilled professionals knowledgeable about all aspects of plumbing and sewage systems. They have extensive experience working in residential and commercial spaces. They are capable of handling a wide variety of plumbing issues and have the necessary stamina to perform challenging physical labor. They also have excellent communication skills and can explain complex technical subjects in simple terms. In addition, they can effectively collaborate with other people in a team.

A plumber inspection is an opportunity for a homeowner to get a detailed look at their plumbing. A visual inspection includes checking the water and sewer fittings for signs of leaks, rust, or damage. This also includes checking all fixtures and appliances like sinks, showerheads, toilets, and water heaters.

The plumber will check each fixture for proper operation, including the water flow rate and any issues with water pressure. In addition, the plumber will inspect all the drain lines for clogs and any signs of leaks. The plumber will also check the water heater for signs of rust or other performance issues.

Plumbing lines run through a home’s walls, floors, and ceilings to connect all the water fixtures and appliances. Problems with these lines are sometimes difficult to spot, especially if hidden behind walls or under floorboards. In these cases, a plumber can recommend a camera inspection. This type of inspection involves feeding a high-resolution camera through the pipes to find the source of any problems.

Leaks are a common plumbing issue that requires immediate attention. Plumbers can use various methods to locate leaks, like visual examination, applying soapy water to joints, or using electronic acoustic detectors. Once a leak is found, the plumber can repair it and ensure no further issues.

Other plumbing problems that plumbers inspect for include corroded or damaged pipes, drainage and venting issues, and code violations. Pipes that aren’t supported properly or that have long vertical runs without support can collapse or break. Plumbers will check for these issues and verify that all pipes meet appropriate size standards.

Drain and venting issues can lead to several problems, including slow-draining tubs or toilets, gurgling sounds, and even sewage backups. Plumbers will check all drain lines for clogs and proper slope and test all vents to ensure they’re clear of obstructions. Plumbers will also examine the water heater for signs of rust or sediment buildup and ensure that it has an adequate pressure relief valve.

Kitchen Remodel

How to Complete a Successful Kitchen Remodel

A kitchen remodel is a big project that can change your entire home. Goals vary from achieving a new look to adding functionality to an outdated space.Kitchen Remodel

A remodel can involve changing the layout by knocking through walls, removing closets, or installing an island. It can also include replacing or upgrading appliances with more energy-efficient models. To learn more, visit www.kitchenremodelsandiegocal.com/.

A kitchen’s layout is a major contributor to its overall function and design. A well-planned arrangement of cabinets, countertops and appliances is the key to an efficient kitchen. This is why most remodels focus on changing the floorplan. Depending on the scope of this work, it may be necessary to add or remove walls, change electrical wiring and make plumbing changes. For this reason, a kitchen remodel is best left to professionals.

In addition, most mid-size and all major kitchen remodels require a permit, which adds time to the project. If you are considering a full renovation, it’s a good idea to start by setting a budget and finding out how much it will cost for the work you want done. It’s also a good idea to consult with a professional kitchen remodeler about your goals for the space and what can be achieved within your budget.

Before you can begin the actual work, it’s a good idea to get inspired by browsing Pinterest boards and home improvement websites. This will help you narrow down your ideas and show them to the designers and contractors working on your kitchen remodel project.

A u-shaped layout is ideal for large kitchens, as it provides storage and workspace on three walls. In a small kitchen, an L-shaped layout allows for the same functionality, but with a limited footprint. An island can be installed in an L-shaped kitchen to create a more open space, while maintaining the work triangle. Another popular kitchen layout is the g-shaped style, which combines an L-shaped kitchen with a partial fourth wall. This is a great option for homeowners who need to separate the kitchen from the rest of the house, but don’t have the space for a more open concept.

Cabinets

Cabinets are the largest kitchen expense, taking up 15%-35% of your budget. Stock cabinets cost less than custom options, which can be made to order with a variety of features. When choosing your cabinetry, look for quality over style. White melamine-coated particle board drawer boxes and flat panel doors indicate cheap quality, while veneered plywood, hardwood frames and solid wood dovetail joinery are durable and expensive.

Color, finish and hardware can also impact the appearance of cabinets. For example, dark cherry cabinets can make a dramatic statement while light maple is a neutral option. The rise of textured finishes also brings the wood grain to the forefront for an organic look.

Depending on your objectives, the scope of your remodel may range from a simple cosmetic refresh to what MyHome design director Ariana Lovato calls a “total gut” that requires knocking down walls and reconfiguring your floorplan (permits are often required for this work). Once you have decided on the scope of your project, it is time to purchase products.

Cabinet selection is the first step, and you will want to have enough space in a garage or other dry area to store each cabinet until it is ready for installation. You should also be prepared to purchase flooring, countertops, lighting fixtures and appliances during this phase.

When installing new cabinets, consider incorporating special storage designs to maximize your space. For example, a pie-corner base cabinet pulls out to utilize dead corners; or a rotating shelf keeps frequently used items within reach. These units minimize space wastage and keep your kitchen more organized. MyHome remodeling consultants in New York can help you plan your new cabinetry with an eye for functionality and visual appeal.

Countertops

Countertops are the workhorses of any kitchen and must be able to stand up to plenty of abuse. Beyond their aesthetic appeal, you should consider how each surface will hold up to your lifestyle, and which ones offer the best value for your money.

For example, granite and concrete are heavy materials that require strong support, while laminate is comparatively lighter. Some stone countertops can even be molded into different shapes and inlaid with decorative elements like broken tiles or sea shells to create one-of-a-kind patterns.

While contrasting countertop materials like marble and quartz can add visual interest, many homeowners prefer to go for the cohesive look of an integrated surface. This means matching the color and texture of the countertop to the backsplash, cabinet doors, and drawer fronts. This streamlined approach also saves time since you don’t need to grout, caulk or seal the counters and backsplash.

Another advantage of integrated countertops is that it helps to make your kitchen feel bigger and more spacious. In addition, it makes cleanup easier because stains don’t show up as easily. If you decide to use a textured material like granite, you may need to perform regular maintenance to keep the surface looking new.

When planning your budget, it’s crucial to account for all of the costs of your kitchen remodel. In addition to labor, you’ll need to consider the cost of materials and any additional upgrades like electrical or plumbing work. For many, this makes a home equity line of credit (HELOC) a good option for financing their kitchen renovation. Similar to a personal loan, a HELOC offers a set borrowing limit and flexible repayment schedule based on the equity in your home.

Appliances

Appliances are one of the final touches that complete a kitchen remodel. While they are not as crucial as the layout or cabinetry, they can have a big impact on how the kitchen looks and functions. Choosing the right appliances early in your kitchen remodel allows you to decide where they will be installed and how much space you have available for them. This also gives you time to research appliances that fit your budget and lifestyle.

Appliance options are almost limitless today. From WiFi-enabled refrigerators and stoves to a wine fridge or beverage column, you can find a variety of specialized appliances to meet your needs. There are also more traditional choices, such as a dishwasher drawer or a separate cooktop. Some kitchen remodelers even choose panel-ready appliances, which allow you to have custom panels installed on the front of the appliances for a seamless look that blends in with your cabinets.

Upgrading your kitchen appliances can also increase the energy efficiency of your home. Upgrading your ovens and dishwashers to those stamped with the Energy Star label can reduce energy usage by 20 to 40 percent. New ventilation systems can help eliminate toxic pollutants and cooking smells that can linger in the air.

Adding safety features during a kitchen remodel can also make your home safer for everyone in it. This includes slip-resistant flooring, a fire extinguisher in an easily accessible place and more. You may also want to consider upgrading your electrical system during a kitchen remodel to accommodate any additional appliances you have planned. For example, a larger refrigerator might require more power than your existing system can handle. A professional electrician can help you plan for this change.

Lighting

Changing up the lighting in your kitchen is a big step that can really boost the style of the room. It can also have a significant impact on your home’s energy efficiency.

Before you start shopping, make sure that you have a clear idea of what you want and need from your new kitchen lighting. This is especially important if you’re doing a full remodel where you may be relocating outlets and other electrical work.

Start by determining what you want your new kitchen to look like, which can involve browsing Pinterest boards and other home improvement sites for inspiration. You can also create a vision board to help you narrow down your options. This will be helpful for you, as well as for the professionals who’ll be working on your project.

Once you have your goals in mind, it’s time to move on to the planning stage. This includes deciding what the scope of your remodel will be, which can range from a cosmetic refresh to a total gut. The latter typically requires demolition and a change in layout, and will likely require permits.

This is also the time to consider whether you will stay in your home during the remodel, and if so, what your plan is for meal prep during construction. This might include setting up a temporary kitchen, staying with friends or renting an apartment.

Lastly, decide how much you’re willing to spend on your remodel and what the most critical elements are. This will help you focus your search and avoid the temptation to buy things that aren’t within your budget. It’s a good idea to set aside some money for unexpected expenses, too.

Plumber

What Does a Residential Plumber Do?

A residential plumber designs, installs, and repairs the systems in homes that allow water and gas to pass through them. These include pipes, valves, fixtures, and appliances like sinks, toilets, and faucets.Plumber

The Woodlands Plumber have an excellent reputation amongst customers and peers. They have references that can vouch for their reliability, professionalism, and work ethic.

A residential plumber is responsible for the installation of plumbing systems in homes. This can include new construction as well as repairs to existing fixtures. They are skilled at reading blueprints and understanding how a plumbing system works before making any installations or repairs. They can also install, repair, and replace a wide variety of household appliances including dishwashers, water heaters, toilets, bathtubs and showers, kitchen sinks, faucets, and garbage disposals. They are also skilled at installing all types of pipe, including copper, PVC, and galvanized. They can work with a variety of tools including hand tools, power tools, and a drain snake.

In addition to installing plumbing, residential plumbers are often called upon to perform many other tasks related to home ownership. This can include unclogging drains, fixing leaky faucets and repairing or replacing water heaters. They can also help their customers choose and purchase the best fixtures for their homes. They are also often called upon to inspect and test plumbing systems and appliances for safety and compliance with local codes.

Another important duty of a residential plumber is to handle the plumbing rough in for new construction. This involves installing all of the pipes before the drywall is put up. This includes determining the location of the main water line and all of the other pipes that will run throughout the home. It is also common for a plumber to be asked to install gas lines as part of the rough in process.

Residential plumbers must be licensed in order to work legally. This requires passing a written and practical exam. The license will typically be valid for three years. It is important for plumbers to keep up with any continuing education requirements in their area in order to remain licensed.

While the responsibilities of a commercial and a residential plumber are very similar, there are some key differences. Commercial plumbers deal with much larger plumbing systems, often times in high-rise buildings. They can be called upon to work on systems that may have hundreds of occupants using them at any given time. This is a large difference from a residential plumber, who works on smaller systems in single-family homes.

Maintenance

Residential plumbing is a vital service to keep your home functioning properly. Regular maintenance can prevent small issues from turning into large problems and save you money in the long run. If you notice any signs of trouble, it’s important to call a professional plumber right away. These experts can repair any issue, from a clogged drain to water heater repairs.

In addition to installing and repairing residential plumbing, these professionals can also handle commercial plumbing tasks. These jobs include repairing gas leaks, sewer lines, and other types of water systems. They also ensure that all installations are done according to the plumbing code specifications. They may also install and maintain heating, ventilation, and air conditioning (HVAC) systems.

A plumber’s job description includes assembling, installing, and repairing pipes, tubes, fittings, and fixtures. They often use hand tools and power tools to perform their duties. They may also need to read and interpret blueprints and other technical documents. Some plumbers also inspect and test high-pressure, steam, and water piping to identify problems.

It is common for homeowners to hire a plumber for routine services such as unclogging drains or replacing faucets. However, you should only work with a professional plumber that has experience in your type of plumbing. In addition to being licensed, reputable plumbers will have a good reputation in the industry. When choosing a plumber, make sure to ask for references from past clients. This will help you find out more about the company’s reputation and work ethic.

Residential plumbing involves working on a variety of projects, from kitchen and bathroom remodels to fixing leaky faucets. Whether you need to replace your toilet or install a new dishwasher, these professionals can handle it all. They can even help you select the best products for your home.

Your home’s plumbing system is connected to a septic tank or sewer line. These lines take wastewater to a treatment plant or to your city’s water supply. Plumbers can help you keep your septic tank and sewer line in good condition by removing waste and ensuring that the lines are free of blockages. In addition, they can help you avoid expensive repairs by performing regular inspections.

Troubleshooting

Residential plumbers deal with a variety of issues. These professionals are most likely to be called in for leaky pipes, clogged toilets and bathtubs, and water heater problems. Many of these plumbing problems seem insignificant at first, but if left unattended they can cause extensive damage to home structures and contents. A plumber must be able to assess and diagnose the problem quickly, and then determine the best way to repair it.

In some cases, a residential plumber may need to read and interpret blueprints in order to correctly install plumbing systems and fixtures. This requires excellent math skills, as well as an ability to work with other people. Many residential plumbers receive their training through an apprenticeship program, which mixes paid on-the-job training with classroom instruction. These programs prepare plumbers for a career in the construction industry, and they also give the plumber a chance to work with different types of materials.

If a plumber notices that a pipe has become corroded, loose fittings, or cracked, they may need to replace it. This can be expensive, but it is the only way to guarantee that the new pipe will not leak or develop additional problems in the future. If a plumber is working on an older home, they may need to take special care to avoid damaging lead or galvanized pipes.

Another major responsibility of a residential plumber is to locate and repair hidden leaks. These are often difficult to find, but the plumber can look for clues such as moisture spots on walls and ceilings. If the paint on a wall or ceiling begins to bubble, it is probably because there is a leak somewhere in the building.

Residential plumbers must be able to troubleshoot and repair plumbing problems in both homes and apartments. They must be familiar with all aspects of plumbing, including sewage and waste systems. These plumbers are also responsible for installing and repairing kitchen and bathroom appliances, such as dishwashers and gas cookers.

A commercial plumber works on larger plumbing systems, such as those found in office buildings, restaurants, and skyscrapers. These systems have much more complex layouts than residential plumbing, and they are used by hundreds of people at once. A plumber who is not familiar with commercial plumbing may not be able to handle the increased workload.

Repair

A residential plumber is tasked with installing and repairing systems that allow water, gas, and waste to pass through a home’s walls and into the sewer system. This involves laying and fitting pipes as well as diagnosing issues with existing plumbing. Residential plumbers must have extensive knowledge of construction methods and materials in order to ensure that all pipes are laid correctly, and can safely support the weight of water and sewage. They also need to be familiar with a variety of tools including soldering, brazing, and welding equipment.

Plumbers can repair a variety of plumbing issues, including leaking faucets, toilets that don’t flush, and signs of water damage in the walls or ceiling. Most of these problems have easy fixes that homeowners can do themselves, but some require the skills and expertise of a professional. If a homeowner notices any of these issues, they should contact a residential plumber right away.

In addition to repairing common plumbing issues, a residential plumber can install new fixtures and appliances like bathtubs, sinks, toilets, showers, and more. They can also help remodel kitchens and bathrooms to make them more functional and attractive. When choosing a plumber, it is important to find one with a strong reputation in the community. This can be done by asking friends and family for recommendations, checking online reviews, and comparing rates.

Depending on the type of plumbing work, a residential plumber can be paid by the hour or given a flat rate for completing the job. This can be a good way to ensure that the plumber is compensated fairly for their work. If the work is complex or requires specialized training, it may be more expensive. In these cases, a homeowner should get multiple estimates to ensure that they are receiving the best possible price. If the homeowner doesn’t have time to shop around, they can ask for references from past clients to compare prices and quality of work. It is also important to read the fine print of any contract before hiring a plumber. This can reveal important information about the plumber’s background, training, and certifications.

leak

Why You Need a Water Pipe Repair

leakA leaking water pipe is more than just an inconvenience. It can also lead to skyrocketing utility bills and costly property damage.

If you find a leak, you can take several quick and inexpensive measures to stop it. However, a professional plumber like Plumbing is always recommended. If a leak is ignored, it can lead to serious property damage.

Whether it’s your water or sewer line, clogs are one of the main reasons you may need to repair a pipe. When substances build up in the pipes, they restrict the flow of water and waste materials. This can cause many problems, from water or waste backups to structural damage and even flooding.

The best way to deal with a clogged water or sewer line is to call a professional plumber right away. They’ll have the tools and know-how to do the job quickly and efficiently. But if you want to try to do some of the work yourself, you can do a few things.

Shut off the water supply as soon as you notice a leak or damaged pipe. This will prevent water from entering the damaged area and causing more damage. It’s also a good idea to turn off any water appliances that aren’t in use at the time.

If you’re unsure how to shut off your home’s water valve, contact your local city government or plumbing service. They’ll likely be able to walk you through the process.

Another sign that you may have a problem with your sewer line is sewage backing up into your toilets. This occurs when there’s a clog in the main sewer line and all of the wastewater is unable to leave your house, forcing it to back up other drain lines.

The first thing to do when you suspect a clog in your main sewer line is to check all of the other drains in your house. If all of them are slow to drain, this is a clear indication that the clog is in the main sewer line.

You can often unclog these types of drains by using a mechanical snake or by having your plumber blow air into the pipe. This type of solution is better for your pipes than commercial drain cleaning products, as it does not pose any danger to your drains, caulking, or seals.

However, if the clog is in the main sewer drain, you will need to have a plumber come out and handle it for you. This is because the main sewer line is part of a public system that connects your home to the sewage removal pipeline.

Corrosion

Corrosion is a major factor in water pipe repair. When metal pipes corrode, they can weaken, leading to small leaks that can quickly turn into major problems. Corrosion happens when the metal in the pipes interacts with oxygen or other elements in the environment. This weakens the surface of the pipe, leaving it vulnerable to cracks and other damage.

There are several signs that you may have corroded water pipes. The most obvious is a metallic taste in your water. This is caused when dissolved metals in the corroded pipes leach into the water supply. The most dangerous dissolved metal is lead, which can cause serious health issues. Another sign is discolored water, such as reddish or brown stains from rust. This is often caused by iron deposits in the corroded pipes, but it can also be due to other metals in the water system.

If you suspect you have a leaking pipe, the first step is to shut off your water. You can do this by turning off the main water valve, usually located in the basement or garage. Once the water is turned off, it’s a good idea to flush all the toilets in your home and open up all the faucets so any water and pressure left in the pipes can escape.

Depending on the severity of the issue, you may need to drain your entire house and replace the damaged sections of pipe. Once the repairs are done, it’s a good idea to install a water filtration system to ensure that any remaining toxins in your water don’t cause additional damage or health issues.

While corrosion is inevitable, there are things you can do to slow the process down and prevent it from occurring as quickly. The most important thing is to regularly check your pipes for any signs of corrosion, such as rusty or discolored water. If you notice any of these symptoms, contact a plumber immediately for inspection and repair.

If you’re concerned about your plumbing, don’t wait to have it repaired. Leaking or corroded pipes can cause significant damage to your property and lower your quality of life. By following a few simple maintenance and prevention tips, you can keep your pipes in great shape for years to come.

Age

As the pipes in a home’s plumbing system age, they become more and more susceptible to wear and tear. The water leaking from these aging pipes may be discolored, resulting in brownish water in the home. This water can also contain dangerous bacteria and toxins, which could lead to illness in a household.

Water pipe repair can be expensive, but it is necessary to protect the integrity of the plumbing system. Older pipes are more prone to failures like cracks and leaks, so it is important to schedule a water line repair as soon as possible.

The aging of water lines can be caused by a variety of factors, including corrosion, the weather, and a lack of maintenance. The Los Angeles Department of Water and Power (LADWP) recently released data that reveals the age of its water mains and their rate of aging. The data revealed that over 5% of LADWP’s water mains are at the end of their life expectancy, and two-thirds are already leaking.

A key factor that influences the age of a water pipe is its material. Copper pipes are less prone to wear and tear than other materials, but they can still corrode over time. When the corrosion process becomes severe, it can lead to a crack in the pipe that will allow water to seep through and cause damage.

Another common factor that affects the age of water pipes is temperature. The freezing and thawing of water can cause pipes to expand, which can weaken the material or lead to breakage. Iron pipes are more vulnerable to this type of stress, but plastic (PVC and PEX) pipes can withstand this pressure better.

A number of studies have analyzed the impact of climate factors on water pipe failures. The studies usually involve dividing the total length of a pipe into different age groups and then studying the effects of climatic factors on those age groups. The models use a number of metrics based on climatic variables, such as temperature and precipitation.

Trenchless Methods

Getting your water lines fixed with traditional trenching methods is costly and time-consuming. It can also be disruptive to your home or business, as traffic is rerouted and areas are cordoned off for the duration of the repair project. Trenchless methods, on the other hand, offer a cost-effective and efficient solution for repairing or replacing damaged pipes. They can be used for new construction as well as the rehabilitation of existing buried pipelines.

One of the most popular trenchless pipe repair methods is sliplining. This involves installing a flexible tube that inflates when pressurized with air or water. The lining fits snugly against the interior walls of the host pipe, strengthening it and creating a watertight seal. It’s especially helpful for aging pipelines that are susceptible to damage from freezing and thawing cycles.

Another trenchless method is pipe bursting. This is ideal for rehabilitating sewer lines, as it eliminates the need to dig up the old line while simultaneously replacing it with a new one. It works by feeding a conical “bursting head” that’s attached to the replacement line through an entry hole in the ground. The bursting head fractures the existing, damaged sewer pipe as it goes through, while simultaneously pushing the new pipe in place of it.

Once the work is complete, the plumbing crew will refill the access holes and restore full service to the property. Before they do so, however, they’ll conduct a final video inspection using robotic equipment to ensure that the repaired line will drain and function properly. This step is essential for ensuring that you get the best results from your water pipe repair.

Aside from being more convenient and affordable, trenchless techniques have a lower environmental impact compared to traditional ones. In addition to minimizing soil disturbance, they can also help protect nearby landscaping and structures from damage. Moreover, they can also avoid disrupting underground systems like electrical and gas lines. In addition, the results of trenchless water pipe repairs are more durable and long-lasting compared to those of traditional approaches. As such, they’re worth the extra investment.


Electrician

What Does a Residential Electrician Do?

Residential electricians specialize in installing and repairing electrical wiring and devices in residential homes. They may work for electrical contractors or on their own as independent contractors. The job is challenging and demanding, and it is essential to follow all safety procedures. Electricians often work nights and weekends to address emergencies in private residences.

Electrician
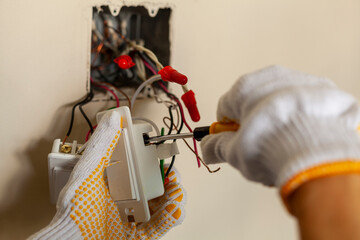
As the name implies, residential electricians work on electrical systems in homes and other buildings. Electrician Fort Lauderdale are responsible for installing, troubleshooting, and maintaining these systems. They often work on low-voltage systems, such as doorbells, thermostats, landscape lighting, and other devices that operate at less than 100 volts. These devices require special knowledge and skill because they are more sensitive to voltage fluctuations and other influences than higher-voltage systems such as the wiring in a home or building.

In addition to working on new electrical systems in existing homes, some residential electricians are involved in constructing commercial and residential buildings. These projects typically involve planning the layout of electrical systems and ensuring that they follow all relevant codes and regulations. These electricians also frequently have to inspect and test wiring, equipment, and other fixtures to ensure that they are in good working order. Many of these electricians are also called on to assist with the installation of emergency power systems and backup generators in both new and older homes.

A good residential electrician is skilled in reading and interpreting technical diagrams. They must also be able to effectively communicate with their customers and clients. This is especially important if they are working in someone’s home, where they must be respectful and courteous of the people who live there.

Because they deal with a wide range of issues in people’s homes, residential electricians must be knowledgeable about many different types of technology. For example, if a homeowner wants to install a solar energy system, the electrician must know how to wire the system correctly and make sure it is compatible with the rest of the house’s electricity system.

Because of the variety of issues that can arise in a person’s home, residential electricians must be prepared to spend time on the road. This means they may have to travel to a number of different houses on any given day, or they may be required to stay at a single location for an entire day while installing a whole-house generator, for instance.

Education and Training Requirements

A residential electrician must complete on-the-job training through an apprenticeship program or attend a vocational school. Vocational and technical schools often offer two-year associate degrees in electrical technology. Some programs offer specializations like renewable energy or industrial electrical technology. Others focus on specific areas of the field, like residential wiring or home security.

Depending on the state, you may be required to pass a written and practical exam before becoming a licensed electrician. These exams are administered by the state’s licensing authority. You can prepare for the exam by taking an online certification course. However, online courses do not provide you with the hands-on experience you need to fulfill your state’s licensure requirements.

You must have excellent problem-solving skills to succeed in a career as a residential electrician. Most of your work involves troubleshooting and repairing existing electrical systems, so it’s important to understand how the system works. This includes understanding the wiring diagrams and knowing which tools to use for different tasks. It’s also important to understand the physics behind electricity so you can make informed decisions when installing new circuits and devices.

A residential electrician installs a wide variety of household technologies, including home security systems and air conditioning units. Many of these devices require high voltage and need to be installed correctly to avoid dangerous malfunctions. Other electrical installations include lighting and control systems, generators, and electric car charging stations.

In addition to having the necessary skills, a good residential electrician needs to have a strong work ethic and the ability to follow safety procedures. They must also be able to read and understand work orders, which are usually delivered via email or on paper. The ability to prioritize and organize is important, as are customer service skills. Finally, a residential electrician must be able to work independently and have good physical endurance.

A career as a residential electrician offers you the opportunity to earn an average salary of $41,500. If you are a skilled electrician, you can increase your earnings by seeking out more complex and challenging projects. This will help you gain more experience and improve your chances of getting hired by a reputable contractor.

Licensing Requirements

Residential electricians work in customer homes, which means they need to effectively communicate with customers and be respectful of private spaces while performing electrical work. They must also understand the local codes and regulations and know how to safely install or repair wiring. Licensing requirements vary from state to state, but most require several years of classroom instruction and hands-on work experience.

To become a licensed residential electrician, you must pass a written and practical exam. The exam covers the installation, repair or replacement of wiring and devices that distribute electricity. In addition to passing the exam, you must submit notarized documents proving that you have 7 years of practical work experience under a licensed journey electrician. In some states, education or training may substitute for part of the work experience requirement.

Electrical contractors must have general liability and workers’ compensation insurance. Residential electricians who work for themselves must carry personal property and professional liability insurance, as well.

Whether you’re working on a new house or an older home, you’ll need to be familiar with the National Electric Code (NEC). This is the standard that determines how and where wiring should be placed in houses and buildings. Its goal is to prevent fires and other accidents from occurring.

You’ll also need to know how to install and replace GFCIs, smoke detectors, receptacles and light switches. In older homes, you may encounter knob and tube (K&T) wiring, which needs to be replaced with up-to-date industry wiring. This requires the skills of a master electrician to ensure it’s done properly and meets current NEC standards.

The tools of the trade include wire strippers, cutters, crimpers and power drills. Some of these are specific to the job, such as those that are designed to cut through studs at right angles, or ones that can be used to install Romex in plastic boxes that are nailed to a stud. You’ll also need a wrench that can be used to tighten or loosen screws on fixtures and electrical devices.

Some states regulate licensing and permitting at the county or municipal level. For example, the City of New York requires electrical contractors to obtain permits before beginning any work on a job. You must also register your business with the local government and pay taxes.

Work Environment

Residential electricians typically work on wiring systems and electrical components like light fixtures, receptacles and outlets in homes or apartments. They may also install and repair specialized power systems, such as those used to run home automation equipment. In addition, these professionals might work on large-scale projects, such as installing electrical wiring in new commercial buildings. They might also be responsible for ensuring that the work they do meets all local and state regulations.

In order to decide whether to specialize as a residential or commercial electrician, it’s important to consider a number of factors, including career path options, the scope of work and interactions with clients. For example, a residential electrician will likely have less opportunity to advance within their field than a commercial electrician. Additionally, residential electricians may earn slightly lower salaries than their commercial counterparts.

Another thing to keep in mind is the type of work environment that you’d prefer to be in. For example, some people may prefer to work in a high-rise building or with a large number of customers and clients. On the other hand, other people may prefer to have a more hands-on role and interact with homeowners directly on a daily basis.

The work environment of a Residential Electrician is often different from that of a commercial electrician, but there are some similarities as well. Both specializations require extensive knowledge of electrical codes and systems. In addition, they both require a high degree of problem-solving skills and the ability to read blueprints.

Both commercial and residential electricians must also work with different types of wiring. Residential electricians often use non-metallic sheathed cable (NM) with a plastic sheath, while commercial electricians tend to work with metal tubing conduits that are designed for larger commercial spaces and power supplies.

Another difference between the two specializations is that residential electricians typically work with voltage systems between 120 and 240 volts, while commercial electricians can work with higher voltage systems. It’s important for these individuals to understand the differences in these voltage systems in order to ensure their safety and the safety of others.